Self-host NocoDB
An Airtable alternative on your own database, with real Postgres underneath.
Shelley handles the setup. About 15 minutes.
Prefer a terminal?
curl -fsSL https://exe.dev/deploy/nocodb/prompt.txt | ssh exe.dev new --prompt=/dev/stdinNocoDB puts a spreadsheet on top of a SQL database: grids, kanban boards, galleries, calendars and forms over PostgreSQL or MySQL tables, with a REST API and an MCP server for the same data. It's the self-hosted answer to Airtable that works on tables you already have, not only ones it made.
On exe.dev it runs on a VM with a persistent disk, private by default: nobody reaches it without your exe.dev login, so it can sit next to your real data. You share it with your team in one command, and a small gate lets the forms and views you choose go public while the app stays private. Scripts and agents on other machines get in with a VM token, whole-disk backups can go to your own S3, and Shelley on the VM can work in your tables through NocoDB's MCP server using exe.dev's LLM gateway. Prefer Teable or Baserow? Both are tested below.
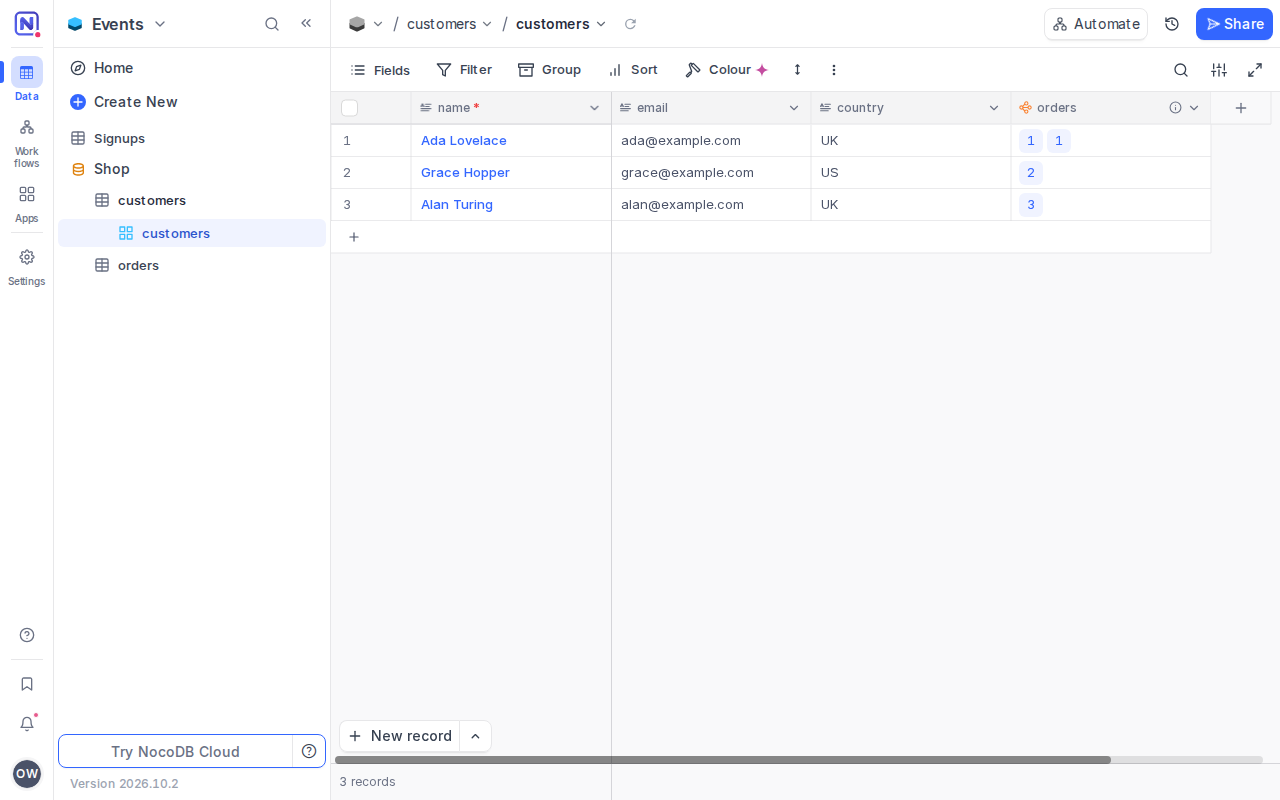
What you get#
- NocoDB with its settings and tables in PostgreSQL, behind exe.dev login.
- An nginx gate that lets the public use shared forms and views, and keeps the rest behind exe.dev login.
- Connections to PostgreSQL or MySQL databases you already have, edited as spreadsheets.
- The REST API and MCP server reachable from other machines with a NocoDB token plus an exe.dev VM token.
- Nightly backups of the database, uploaded files, and keys; everything restarts after a reboot.
What's running, and where
https://my-nocodb.exe.xyz/
NocoDB, after exe.dev login, for you and anyone you share the VM with. Make it public and shared forms and views open for anyone, while the rest still asks for exe.dev login.
Deploy with Shelley#
Click Deploy and Shelley will set up NocoDB on a new VM, then check that it works. No config-file wrangling required.
Prefer a terminal?
curl -fsSL \
  https://exe.dev/deploy/nocodb/prompt.txt \
  | ssh exe.dev new --prompt=/dev/stdin
What Shelley is told
Set up NocoDB on this VM by following the exe.dev recipe at https://exe.dev/deploy/nocodb.md?via=deploy from top to bottom.

The recipe's example VM name is my-nocodb. This VM's name is the output of `hostname`: use it wherever the recipe writes my-nocodb. Skip the step that creates the VM; you are on it.

You are done when all of these are true. Check each one yourself:
- NocoDB with its settings and tables in PostgreSQL, behind exe.dev login.
- An nginx gate that lets the public use shared forms and views, and keeps the rest behind exe.dev login.
- Connections to PostgreSQL or MySQL databases you already have, edited as spreadsheets.
- The REST API and MCP server reachable from other machines with a NocoDB token plus an exe.dev VM token.
- Nightly backups of the database, uploaded files, and keys; everything restarts after a reboot.

Read the whole recipe, including closed details, and follow "Install by
hand" first. The walkthrough sections are for the owner afterwards.
Do not create the NocoDB account: the first person to sign up becomes
the super admin, so leave it to the owner and don't share the VM before
they have. Don't make the VM public, connect databases, create tokens,
or invite people. Do not run the Restore or Update instructions.
Work as exedev in ~/nocodb. Verify docker.service is enabled, both
containers are healthy, and the checks at the end of "Add the gate"
print what the recipe says. Check that the backup timer is enabled and
the first archive lists nocodb.dump and data.tar.
Finish with https://<vm>.exe.xyz/ and tell the owner to sign up
there to become the NocoDB super admin.

Finish with the URLs I should open.
Also at /deploy/nocodb/prompt.txt. The recipe it follows is /deploy/nocodb.md.
Sign in and make a table#
Open https://my-nocodb.exe.xyz/. exe.dev asks you to log in, then
NocoDB asks you to sign up. The first account becomes the
super admin, so create yours before you share the VM. After a
question you can skip, you land in your workspace with a Getting
Started project. NocoDB calls a set of tables a project (its API says
base).
Create a project, then a table, add a few fields and type in some rows. From the view bar you can add a form, gallery, kanban or calendar view of the same table.
There are two locks. exe.dev decides who can reach the VM at all, and NocoDB decides what each of them sees and can change. To add someone, on your computer:
ssh exe.dev share add my-nocodb alice@example.com
Then in NocoDB, open your avatar → Account → User Management → Invite User. With no mail server set up, NocoDB shows a sign-up link to copy and send yourself. Give people the Editor role unless they need to add tables or data sources.
Edit an existing database as a spreadsheet#
This is where NocoDB differs from most Airtable alternatives: point it at a database you already run and edit its tables in place.
First give NocoDB its own database role. In PostgreSQL, one that can change rows but not tables:
CREATE ROLE nocodb_editor LOGIN PASSWORD 'pick-a-long-password';
GRANT SELECT, INSERT, UPDATE, DELETE ON ALL TABLES IN SCHEMA public TO nocodb_editor;
GRANT USAGE ON ALL SEQUENCES IN SCHEMA public TO nocodb_editor;
Then pick the address NocoDB uses, from inside its container:
- A database on this VM, such as our PostgreSQL recipe
or MySQL: host
host.docker.internal. The database has to accept connections from Docker's network; the PostgreSQL recipe shows how in From a Docker container. - A database on another VM or server: join both to your tailnet as in Connect from another VM and use the other machine's Tailscale address. exe.dev's proxy only carries HTTPS, so Tailscale is how database ports travel between VMs.
In a project, choose Connect to DB → New connection → PostgreSQL (or MySQL, SQLite, SQL Server, Oracle). Fill in host, port, user, password and database, click Test connection, then Create connection. Name the data source and click Add Source.
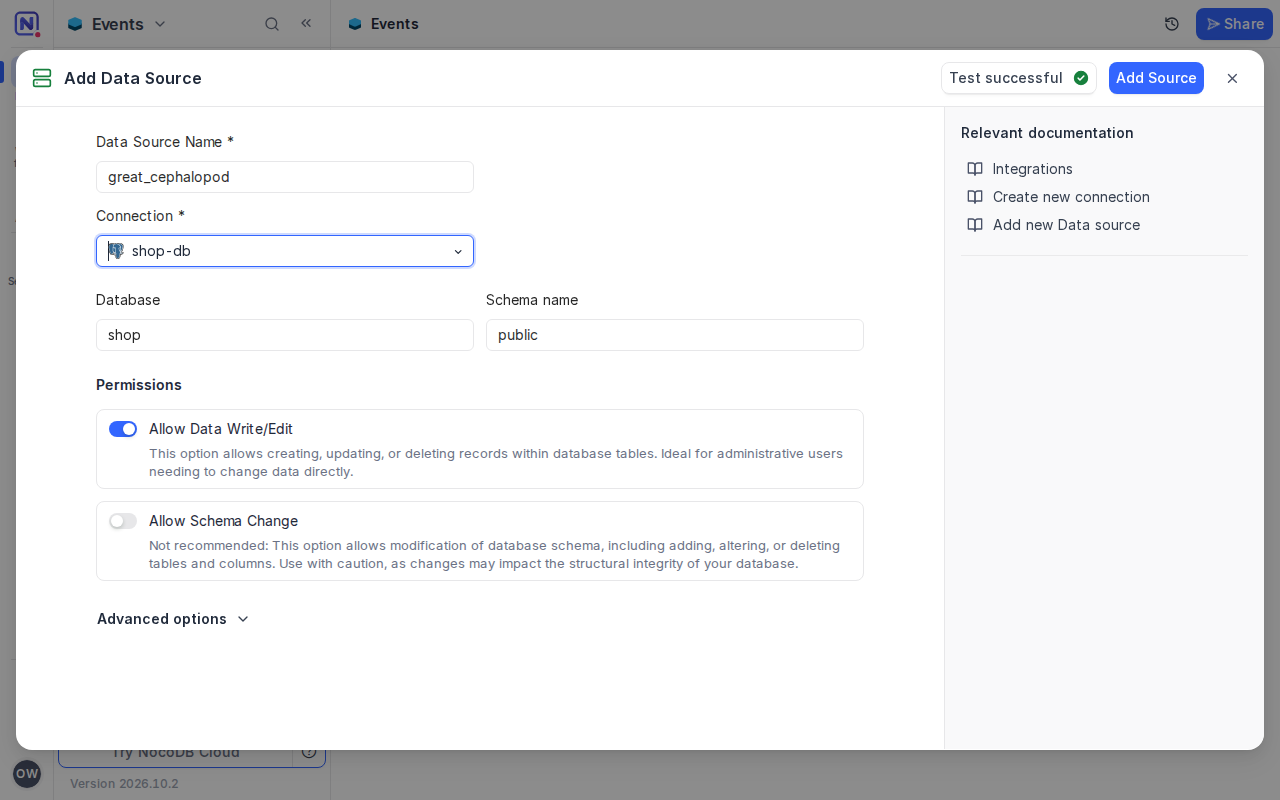
The tables appear in the sidebar. In our test, changing a cell in
NocoDB changed the row in PostgreSQL at once, and a row added in
NocoDB was there for psql. Nothing is copied: NocoDB keeps only its
view settings in its own database.
Note
The install sets
NC_ALLOW_LOCAL_EXTERNAL_DBS=true. Without it, NocoDB refuses private addresses with "Connection to internal hosts is not allowed", which rules out this VM and your tailnet. The flip side: anyone who can add a data source can aim NocoDB at those addresses, its own database included. That's why invited people should be editors.
Share a form with the world#
NocoDB can share a form or a read-only view by link. On a private VM, that link still asks for exe.dev login, which is right for your team and wrong for a sign-up form. Making the whole VM public would put NocoDB's sign-in page and API on the internet, so the install puts a small nginx gate in front of it:
- Shared forms and views (
/nc/form/…,/nc/view/…, their assets and their public API) go straight through to NocoDB. - Everything else needs exe.dev login. Anyone who isn't signed in goes to exe.dev's login page, just as on a private VM.
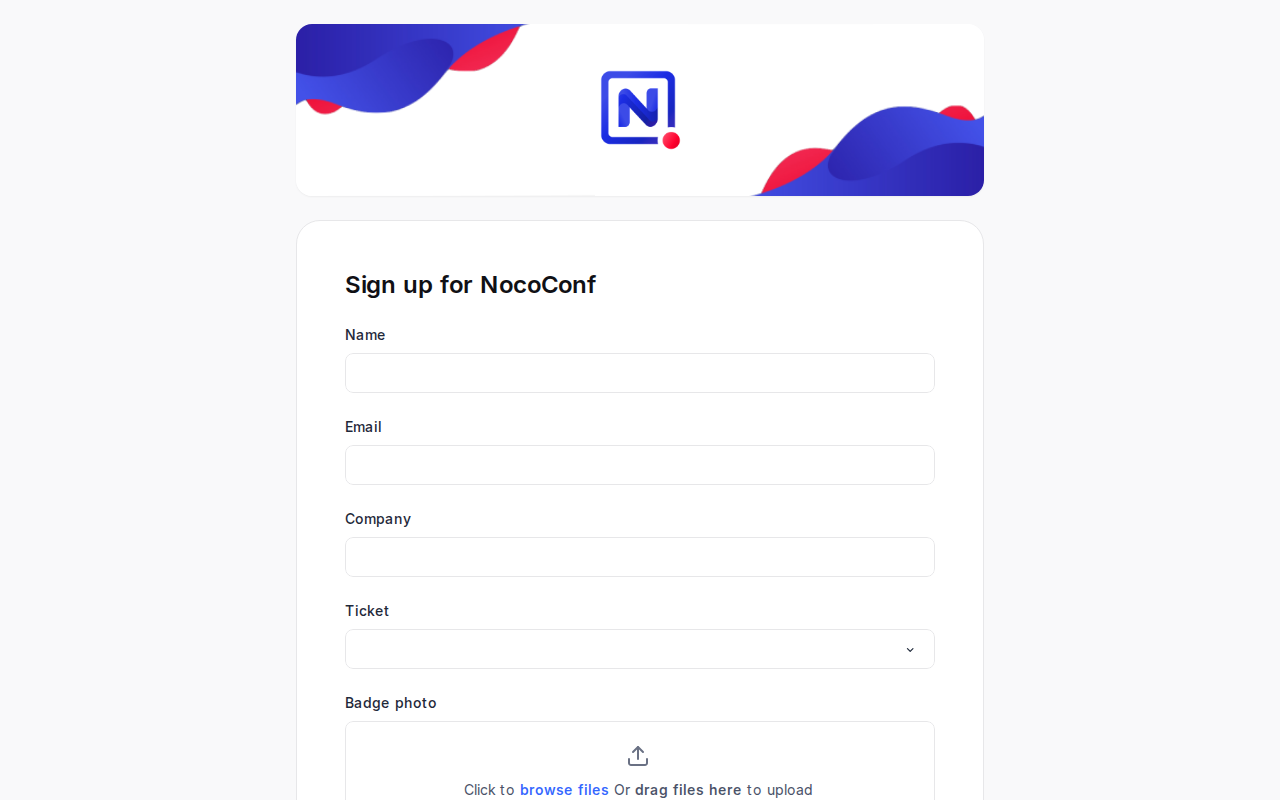
Make a form view, then click Share → Share to web and copy the
link, https://my-nocodb.exe.xyz/nc/form/…. Then make the VM public.
On your computer:
ssh exe.dev share set-public my-nocodb
Open the link in a private window: no login, and submitting works,
file uploads included. https://my-nocodb.exe.xyz/ itself still sends
you to exe.dev's login, and so does the API without a VM token.
What you're opening up:
- Anyone with a link can use it. Links are long random IDs, and the share dialog can add a password.
- A shared grid or gallery shows every row and field in that view. Make a separate view with filters and hidden fields for sharing.
- Files in shared views are served through signed links that expire after two hours.
- Every shared view on the VM is public while the VM is. Turn sharing
off per view in the share dialog, or make the VM private again with
ssh exe.dev share set-private my-nocodb.
Use the API and MCP from elsewhere#
In NocoDB, open Account → API Tokens and create a token. On the
VM, scripts talk to NocoDB directly, so that's all they need. The table ID is the part of a table's
address after the project ID (it starts with m):
curl -s -H "xc-token: $NOCODB_TOKEN" \
  http://localhost:8080/api/v2/tables/TABLE_ID/records
From another machine, the request first has to get past exe.dev's login. Create a VM token for that. On your computer:
ssh exe.dev ssh-key generate-api-key --vm=my-nocodb --label=nocodb-api --exp=90d
Send both tokens, the VM token in X-Exedev-Authorization, which the
proxy strips before NocoDB sees the request:
curl -s https://my-nocodb.exe.xyz/api/v2/tables/TABLE_ID/records \
  -H "X-Exedev-Authorization: Bearer $VM_TOKEN" \
  -H "xc-token: $NOCODB_TOKEN"
Without the VM token you get exe.dev's 401 (a 302 to its login page
once the VM is public); without the NocoDB token,
NocoDB's Authentication required. Tools that only do basic auth can
send the VM token as the password (curl -u x:$VM_TOKEN). The API
reference is at nocodb.com/apis/v2/data.
NocoDB also has an MCP server, so agents can query and edit your
tables. In Account → MCP Server → Manual connections, click
New Connection, pick what it may do (Read & write all leaves out
deletes), and create it. NocoDB shows a ready command for Claude Code,
Codex, Cursor and others, with an address like
https://my-nocodb.exe.xyz/mcp/<id> and an x-api-key header.
On another machine, add the VM token as a second header:
claude mcp add --transport http nocodb https://my-nocodb.exe.xyz/mcp/<id> \
  --header "x-api-key: $NOCODB_MCP_KEY" \
  --header "X-Exedev-Authorization: Bearer $VM_TOKEN"
On the VM, Shelley or Claude Code can use
http://localhost:8080/mcp/<id> with the x-api-key header alone. The
AI apps tab signs in from hosted apps such as Claude and ChatGPT;
they can't get past exe.dev's login, so use manual connections.
Files and attachments#
Uploaded files live in ~/nocodb/data on the VM's disk and go into the
nightly backup. NocoDB takes files up to 20 MB by default
(NC_ATTACHMENT_FIELD_SIZE, in bytes). With
NC_ATTACHMENT_ACCESS_CONTROL_ENABLED on, as here, files are only
served through signed links, so a copied file address stops working
after two hours.
NocoDB can keep files in S3 instead (the NC_S3_* settings). It then
hands browsers presigned links straight to the bucket, so everyone who
opens a file must be able to reach your S3 endpoint. A bucket from our
S3 storage recipe needs its S3 port made public
for that, as its page explains. On one VM, the local disk is simpler.
Teable or Baserow instead?#
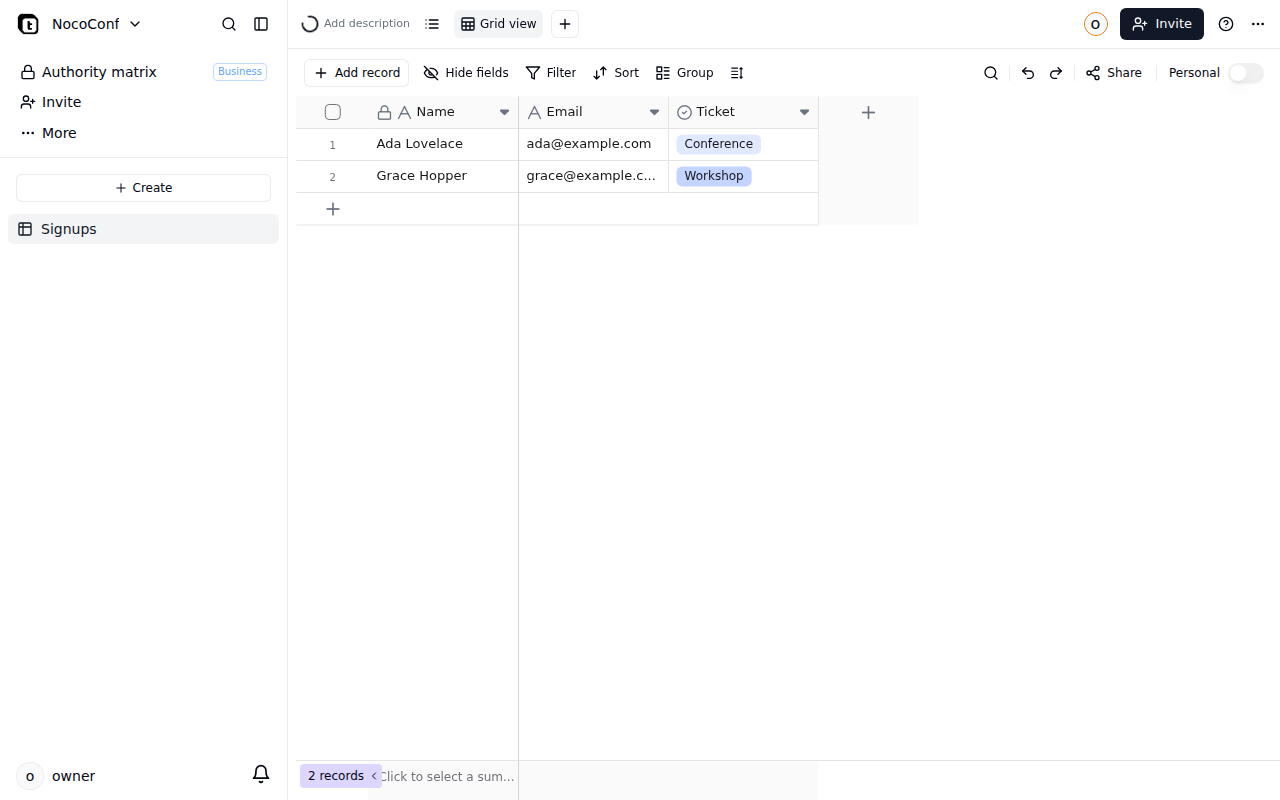
We installed both on a test VM and made a first table in each. They want a VM of their own, since each takes port 8000.
Teable is the Postgres-native one: every
project is a PostgreSQL schema and every table a real table with a
column per field, so SQL, Metabase or pg_dump see
your data as you built it. The core is AGPL-3.0. It needs PostgreSQL and
Redis, its image is 3.6 GB, and it used 1.4 GB of memory.
Baserow has an MIT core with paid premium
features, and is built to be extended: plugins
add field types and more, baked into your own image. It also has an
application builder, dashboards and automations. Its Admin settings →
AI providers takes an OpenAI provider with a base URL, and
https://llm.int.exe.xyz/v1 passed its test there with any API key, so
it can use exe.dev's LLM gateway without a key of yours. The
all-in-one image (2.4 GB) bundles PostgreSQL, Redis and Caddy and used
about 2.9 GB of memory.
Pick NocoDB for a database you already have, Teable for tables that are plain PostgreSQL, Baserow for plugins and AI fields through the gateway.
Install Teable
On a new VM, with Teable on port 8000. Teable tags its images by
release date; this is the one we tested. Pin one rather than latest:
sudo systemctl enable --now docker.service
mkdir -p ~/teable && cd ~/teable
touch .env && chmod 600 .env
cat >> .env <<EOF
POSTGRES_PASSWORD=$(openssl rand -hex 24)
REDIS_PASSWORD=$(openssl rand -hex 24)
SECRET_KEY=$(openssl rand -hex 32)
PUBLIC_ORIGIN=https://$(hostname).exe.xyz
EOF
cat > compose.yaml <<'EOF'
name: teable

services:
  teable:
    image: ghcr.io/teableio/teable:release.2026-11-20T02-10-33Z.3993
    restart: unless-stopped
    ports:
      - "8000:3000"
    volumes:
      - ./assets:/app/.assets
    environment:
      PUBLIC_ORIGIN: ${PUBLIC_ORIGIN:?set in .env}
      SECRET_KEY: ${SECRET_KEY:?set in .env}
      PRISMA_DATABASE_URL: postgresql://teable:${POSTGRES_PASSWORD:?set in .env}@postgres:5432/teable
      BACKEND_CACHE_PROVIDER: redis
      BACKEND_CACHE_REDIS_URI: redis://default:${REDIS_PASSWORD:?set in .env}@redis:6379/0
    depends_on:
      postgres:
        condition: service_healthy
      redis:
        condition: service_healthy

  postgres:
    image: postgres:17
    restart: unless-stopped
    environment:
      POSTGRES_USER: teable
      POSTGRES_DB: teable
      POSTGRES_PASSWORD: ${POSTGRES_PASSWORD:?set in .env}
    volumes:
      - ./postgres:/var/lib/postgresql/data
    healthcheck:
      test: ["CMD", "pg_isready", "-U", "teable", "-d", "teable"]
      interval: 10s
      timeout: 5s
      retries: 5

  redis:
    image: redis:7
    restart: unless-stopped
    command: redis-server --appendonly yes --requirepass ${REDIS_PASSWORD:?set in .env}
    environment:
      REDIS_PASSWORD: ${REDIS_PASSWORD:?set in .env}
    volumes:
      - ./redis:/data
    healthcheck:
      test: ["CMD-SHELL", "redis-cli -a $$REDIS_PASSWORD ping | grep PONG"]
      interval: 10s
      timeout: 5s
      retries: 5
EOF
docker compose up -d --wait --wait-timeout 300
curl -s localhost:8000/health
The health check answers {"status":"ok",...}. Open
https://<vm>.exe.xyz/ and sign up: the first account is the admin.
Create a space, a project, and a table. On the VM,
docker compose exec postgres psql -U teable -c '\dn' lists one
schema per project. Back up with pg_dump and a copy of assets and
.env, as in NocoDB's backup script below.
Install Baserow
On a new VM, with Baserow's all-in-one image on port 8000:
sudo systemctl enable --now docker.service
mkdir -p ~/baserow && cd ~/baserow
cat > compose.yaml <<EOF
name: baserow

services:
  baserow:
    image: baserow/baserow:2.4.3
    restart: unless-stopped
    ports:
      - "8000:80"
    environment:
      BASEROW_PUBLIC_URL: https://$(hostname).exe.xyz
    volumes:
      - ./data:/baserow/data
EOF
docker compose up -d
until curl -fs -o /dev/null -H "Host: $(hostname).exe.xyz" localhost:8000/api/_health/; do sleep 5; done; echo ready
The first start, which sets up its database, took about two minutes;
restarts take under 30 seconds. Baserow answers by host name, so
curl localhost:8000 alone gets Site not found; use the VM's
address. Open https://<vm>.exe.xyz/ and sign up: the first account is
the admin. Create a workspace, a database and a table. Everything,
PostgreSQL included, is in ~/baserow/data; Baserow's
backup docs
cover exporting it.
For AI, open Admin settings → AI providers → Add provider,
choose OpenAI, enter any API key, set Base URL to
https://llm.int.exe.xyz/v1, and add a model from
curl -s https://llm.int.exe.xyz/v1/models. Your
LLM integration must be attached to the VM.
Keep your data#
NocoDB's settings, your projects and the tables you made in it live in
PostgreSQL in ~/nocodb/postgres; uploaded files in ~/nocodb/data.
The nightly backup in ~/nocodb/backups holds both, plus the .env
with NocoDB's keys. Databases you connected are not in it: back them up
where they live. Keep a copy off the VM. On your computer:
scp -r my-nocodb.exe.xyz:nocodb/backups .
Backups hold the key that unlocks the database passwords NocoDB saved, so keep them private. For the whole disk, set up VM backups to your own S3 bucket.
What to know before you rely on it:
- It runs on CPU. A few people and tables of tens of thousands of rows
are no strain for the default VM; give it more with
ssh exe.dev resize my-nocodb --cpu=4 --memory=16GB. - Files fill the VM's disk. Check with
df -h /, grow withssh exe.dev resize my-nocodb --disk=50GB. - exe.dev's proxy carries HTTP(S) only. Database ports don't go through it; use Tailscale between machines.
- The Community Edition has one workspace and no SSO, audit log, or AI features.
The nuts and bolts#
Happy clicking Deploy? You can stop here. These are Shelley's setup steps and your maintenance reference.
Install by hand
Create a VM#
On your computer (pick another name if my-nocodb is taken):
ssh exe.dev new --name=my-nocodb
ssh my-nocodb.exe.xyz
The default VM is plenty. All remaining installation commands run on
the VM, as exedev.
Write the secrets#
One private file holds the PostgreSQL password, the key that signs
NocoDB's sessions, and the key that encrypts the database passwords
you give NocoDB. Never change NC_CONNECTION_ENCRYPT_KEY once you've
connected a database: NocoDB could no longer read those passwords.
mkdir -p ~/nocodb && cd ~/nocodb
touch .env && chmod 600 .env
cat >> .env <<EOF
POSTGRES_PASSWORD=$(openssl rand -hex 24)
NC_AUTH_JWT_SECRET=$(openssl rand -hex 32)
NC_CONNECTION_ENCRYPT_KEY=$(openssl rand -hex 32)
NC_SITE_URL=https://$(hostname).exe.xyz
EOF
ls -l .env
ls shows -rw-------.
Start NocoDB and PostgreSQL#
NocoDB listens only on the VM itself, for nginx to put in front. NC_TRUST_PROXY makes it trust exe.dev's
proxy for the visitor's address, and extra_hosts lets it reach
databases on the VM as host.docker.internal:
cat > compose.yaml <<'EOF'
name: nocodb

services:
  nocodb:
    image: nocodb/nocodb:2026.10.2
    restart: unless-stopped
    ports:
      - "127.0.0.1:8080:8080"
    extra_hosts:
      - "host.docker.internal:host-gateway"
    environment:
      NC_DB: "pg://postgres:5432?u=nocodb&p=${POSTGRES_PASSWORD:?set in .env}&d=nocodb"
      NC_AUTH_JWT_SECRET: ${NC_AUTH_JWT_SECRET:?set in .env}
      NC_CONNECTION_ENCRYPT_KEY: ${NC_CONNECTION_ENCRYPT_KEY:?set in .env}
      NC_SITE_URL: ${NC_SITE_URL:?set in .env}
      NC_TRUST_PROXY: "1"
      NC_ALLOW_LOCAL_EXTERNAL_DBS: "true"
      NC_ATTACHMENT_ACCESS_CONTROL_ENABLED: "true"
    volumes:
      - ./data:/usr/app/data
    depends_on:
      postgres:
        condition: service_healthy
    healthcheck:
      test: ["CMD-SHELL", "wget -q --tries=1 --spider http://localhost:8080/api/v1/health || exit 1"]
      interval: 15s
      timeout: 5s
      retries: 5
      start_period: 60s

  postgres:
    image: postgres:17
    restart: unless-stopped
    environment:
      POSTGRES_USER: nocodb
      POSTGRES_DB: nocodb
      POSTGRES_PASSWORD: ${POSTGRES_PASSWORD:?set in .env}
    volumes:
      - ./postgres:/var/lib/postgresql/data
    healthcheck:
      test: ["CMD", "pg_isready", "-U", "nocodb", "-d", "nocodb"]
      interval: 10s
      timeout: 5s
      retries: 5
EOF
sudo systemctl enable --now docker.service
docker compose up -d --wait --wait-timeout 300
curl -fsS localhost:8080/api/v1/health; echo
The health check prints {"message":"OK",...}. NocoDB was up about 30
seconds after the images finished downloading. NocoDB's own guide adds
Redis and a worker container for background jobs at scale; forms, files,
imports and the API worked without them here.
Add the gate#
NocoDB only listens on the VM itself. nginx answers on the VM's address
and lets shared forms and views, their scripts and styles, their public
API and signed file links through. Everything else needs exe.dev login:
a request without the X-ExeDev-Email header, which exe.dev's proxy
adds for signed-in visitors, goes to the login page. While the VM is
private the proxy has already asked everyone to log in; the gate matters
once you make it public.
sudo tee /etc/nginx/sites-available/nocodb >/dev/null <<'EOF'
map $http_upgrade $connection_upgrade {
    default upgrade;
    ''      '';
}

server {
    listen 8000 default_server;
    listen [::]:8000 default_server;
    server_name _;
    client_max_body_size 25m;
    absolute_redirect off;

    proxy_http_version 1.1;
    proxy_set_header Upgrade $http_upgrade;
    proxy_set_header Connection $connection_upgrade;
    proxy_set_header Host $http_host;
    proxy_set_header X-Forwarded-Proto $http_x_forwarded_proto;
    proxy_set_header X-Forwarded-For $http_x_forwarded_for;

    # Shared views and forms, and only what they need: open to anyone.
    location ~ ^/(_nuxt/|nc/(form|view|gallery|kanban|calendar|base)/|api/v[0-9]+/(db/)?public/|api/v1/db/meta/nocodb/info$|favicon|dltemp/) {
        proxy_pass http://127.0.0.1:8080;
    }

    # Everything else: exe.dev login first.
    location / {
        if ($http_x_exedev_email = "") {
            return 302 /__exe.dev/login?redirect=$uri;
        }
        proxy_pass http://127.0.0.1:8080;
    }
}
EOF
sudo rm -f /etc/nginx/sites-enabled/default
sudo ln -sf /etc/nginx/sites-available/nocodb /etc/nginx/sites-enabled/nocodb
sudo nginx -t && sudo systemctl enable --now nginx && sudo systemctl reload nginx
curl -s -o /dev/null -w '%{http_code} %{redirect_url}\n' localhost:8000/
curl -s -H 'X-ExeDev-Email: test@example.com' localhost:8000/api/v1/health; echo
The first check prints 302 http://localhost:8000/__exe.dev/login?redirect=/,
exe.dev's login page; the second prints {"message":"OK",...}.
Schedule backups#
A script dumps NocoDB's database, copies the uploaded files out of the container, and keeps two weeks of archives; a systemd timer runs it nightly:
cat > backup.sh <<'EOF'
#!/bin/sh
# Back up NocoDB: its database, uploaded files, and the .env with its keys.
set -eu
umask 077
cd "$(dirname "$0")"
mkdir -p -m 700 backups
out="backups/nocodb-$(date +%Y%m%d-%H%M%S).tar.gz"
work=$(mktemp -d)
trap 'rm -rf "$work"' EXIT
docker compose exec -T postgres pg_dump -U nocodb -d nocodb -Fc > "$work/nocodb.dump"
docker compose exec -T postgres pg_restore --list < "$work/nocodb.dump" > /dev/null
docker compose exec -T nocodb tar -C /usr/app -cf - data > "$work/data.tar"
cp .env compose.yaml "$work/"
tar -C "$work" -czf "$out.tmp" .
mv "$out.tmp" "$out"
find backups -name 'nocodb-*.tar.gz' -mtime +14 -delete
EOF
chmod +x backup.sh

sudo tee /etc/systemd/system/nocodb-backup.service >/dev/null <<'EOF'
[Unit]
Description=Back up NocoDB
After=docker.service

[Service]
Type=oneshot
User=exedev
ExecStart=/home/exedev/nocodb/backup.sh
EOF
sudo tee /etc/systemd/system/nocodb-backup.timer >/dev/null <<'EOF'
[Unit]
Description=Back up NocoDB nightly

[Timer]
OnCalendar=daily
Persistent=true

[Install]
WantedBy=timers.target
EOF
sudo systemctl daemon-reload
sudo systemctl enable --now nocodb-backup.timer
sudo systemctl start nocodb-backup.service
systemctl list-timers nocodb-backup.timer
tar -tzf backups/nocodb-*.tar.gz
The timer should list its next run, and the archive should hold
nocodb.dump, data.tar, .env, and compose.yaml. You're ready:
open https://<vm>.exe.xyz/ and sign up to become the super
admin.
Back up and restore
To take an extra backup, on the VM:
cd ~/nocodb
./backup.sh
Restore#
Pick an archive in backups/ and substitute its filename below. On a new
VM, run Install by hand first and copy your archive into that folder.
These commands run on the VM. They take NocoDB's keys from the
backup, keep this VM's PostgreSQL password, and set the current database
and files aside rather than delete them:
cd ~/nocodb
backup=backups/nocodb-YYYYMMDD-HHMMSS.tar.gz
work=$(mktemp -d)
tar -C "$work" -xzf "$backup" &&
docker compose exec -T postgres pg_restore --list < "$work/nocodb.dump" >/dev/null &&
sudo systemctl stop nocodb-backup.timer nocodb-backup.service &&
docker compose stop nocodb &&
cp -p .env ".env.before-restore-$(date +%s)" &&
for key in NC_AUTH_JWT_SECRET NC_CONNECTION_ENCRYPT_KEY; do
  line=$(grep "^$key=" "$work/.env") && sed -i "s|^$key=.*|$line|" .env
done &&
docker compose exec -T postgres psql -U nocodb -d postgres \
  -c "ALTER DATABASE nocodb RENAME TO nocodb_before_restore_$(date +%s)" \
  -c "CREATE DATABASE nocodb" &&
docker compose exec -T postgres pg_restore -U nocodb -d nocodb --exit-on-error < "$work/nocodb.dump" &&
sudo mv data "data.before-restore-$(date +%s)" &&
sudo tar -C . -xf "$work/data.tar" &&
docker compose up -d --wait &&
sudo systemctl start nocodb-backup.timer &&
rm -rf "$work"
Sign in and check your tables, files, and connected databases. Once
you're happy, delete the set-aside copies: sudo rm -rf data.before-restore-*, and for the database, list it with
docker compose exec postgres psql -U nocodb -d postgres -c '\l', then
docker compose exec postgres dropdb -U nocodb nocodb_before_restore_....
Update
NocoDB asks self-hosters to pin a version rather than follow latest.
Read the release notes,
change the tag in compose.yaml (to nocodb/nocodb:2026.11.0, say),
then on the VM back up and restart:
cd ~/nocodb
./backup.sh && docker compose pull && docker compose up -d --wait --wait-timeout 300
NocoDB updates its database on start. To undo an update, put the old tag back and restore the backup you just took.
After an update, open a shared form in a private window. If a part of
it fails to load, a new path is missing from nginx's list: check
sudo tail /var/log/nginx/access.log for requests answered 302.
Something's not happy?
Start with the logs. On the VM:
cd ~/nocodb
docker compose ps
docker compose logs --tail=50 nocodb
- Down after a reboot? Run
sudo systemctl enable --now docker.service. - A shared link asks for exe.dev login? The VM isn't public:
ssh exe.dev share show my-nocodb. Connection to internal hosts is not allowed?NC_ALLOW_LOCAL_EXTERNAL_DBSis missing fromcompose.yaml.- Can't reach a database? From the VM, try it outside Docker first,
e.g.
nc -zv 100.x.y.z 5432over Tailscale. For PostgreSQL on this VM, check itslisten_addressesandpg_hba.conffor Docker's network. 401or302from a script? The VM token is missing, expired, or for another VM.ERR_AUTHENTICATION_REQUIREDmeans the NocoDB token is.- Locked out? Set
NC_ADMIN_EMAILandNC_ADMIN_PASSWORDincompose.yaml, rundocker compose up -d, sign in, and remove them again.
Frequently asked questions#
Is NocoDB free to self-host?
The Community Edition is free and is what this recipe runs. Since January 2026 NocoDB is under the Sustainable Use License, a fair-code license: you can use it inside your company, but not sell it as a hosted service. Earlier releases were AGPL-3.0. SSO, audit logs, AI fields and more than one workspace need a paid license.
Can NocoDB edit my existing PostgreSQL or MySQL database?
Yes. Add it as a data source and its tables appear as grids, with foreign keys as links. Edits go straight into the real tables. Give NocoDB a database role that can change rows but not the schema.
Do the people I share it with need an exe.dev account?
For the app itself, yes: it stays behind exe.dev login, and inside it each person also has a NocoDB account with a role. People filling in a form or reading a shared view need neither, once you make the VM public.
Does NocoDB's AI work with exe.dev's LLM gateway?
Not in the Community Edition, which has no AI features to configure. What works is the other direction: NocoDB's MCP server lets an agent such as Shelley, which already uses the gateway, read and edit your tables. Baserow can use the gateway directly.
NocoDB, Teable or Baserow?
NocoDB to put a spreadsheet on a database you already have. Teable when you want the tables you build to be ordinary PostgreSQL tables and an AGPL license. Baserow for an MIT core, plugins, and AI fields through exe.dev's gateway. All three are tested below.
How much disk and memory does it need?
NocoDB and PostgreSQL used about 850 MB of memory and 2 GB of disk for images in our test, so the default VM is plenty. Uploaded files take the rest of the disk; check with df -h / and grow it with ssh exe.dev resize.
Published Nov 21, 2026 · Updated Nov 21, 2026 · tested end to end Nov 21, 2026 · Markdown · manifest.json · Something wrong? Tell us